Tutorial: Local Host
NOTE THAT THIS IS FOR A WINDOWS BASED SETUP
I personally use a windows device, I have very limited knowledge of MacOS or Linux* setup, however both should be very similar. I cannot provide help for bugs encountered on these Operating Systems outside of general google search.
Lorekeeper Setup Tutorial: Tutorial: Setting Up
This guide takes the approach that the reader has no or very little knowledge about XAMPP before beginning the guide. It may be more beneficial for more advanced users to skip towards the end of the guide, or read Draginraptor’s guide located here.
This guide is also made under the assumption the user is already familiar with Sourcetree or another git client and has a local copy of the Lorekeeper files. See Tutorial: Introduction To Git for git basics. Moif has an excellent tutorial located here using Sourcetree to get a local copy. You cannot just download it from github directly, you must use something like SourceTree due to how Lorekeeper is built.
Original/Google doc version: https://docs.google.com/document/d/1K7_BAYfTg7ZQahxNMcILLyn5D5mIGnnKvqhYOm6iFKo/edit?usp=sharing
*Note from Mercury: I do have experience with setting up a local dev environment on Linux and will assemble a basic guide on request if there is interest.
Contents
Install/Initial Setup
To begin our tutorial, you’ll need the following:
- XAMPP
- Note that you must download a version of XAMPP with specifically PHP 8.1.
If you see the following warning, press OK. Provided you have followed the instructions in it and installed XAMPP in a different location, it shouldn’t impact anything Lorekeeper related.
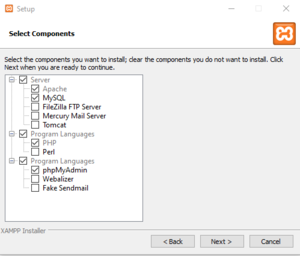
When installing, you may receive multiple options on what to include. The following are required, but you can choose more if you wish.
After this, complete the install as usual!
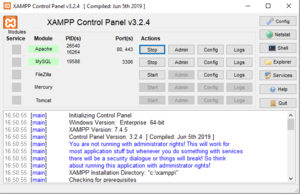
One completed, XAMPP should look similar to this:
(OPTIONAL) To make starting your server easier, consider enabling MySQL and Apache to either:
- Start as a service (requires running XAMPP in administrator mode), or
- Start as soon as XAMPP is opened.
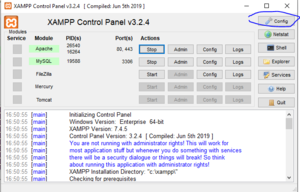
- You can do this by going into config:
- You can do this by going into config:
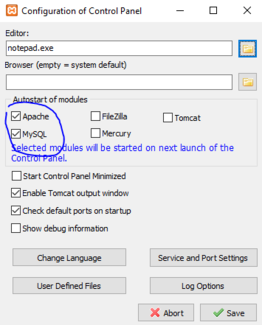
And then selecting the following
Click save and it should be done!
Lorekeeper Setup
Similarly to live servers, Lorekeeper running locally requires a database and packages (managed by Composer).
To start, we will install Composer. Composer can be downloaded here (Composer-Setup.exe).
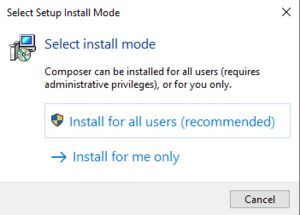
I personally recommend installing for all users.
If you are prompted to add PHP to your path, do so; this is important for running commands later.
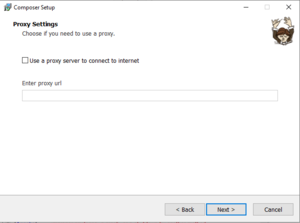
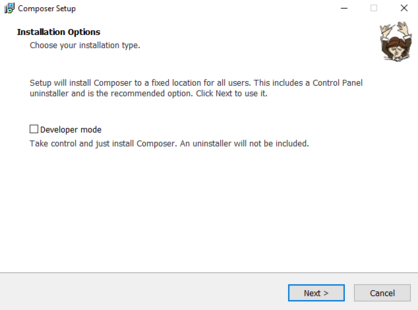
Do not select developer mode, and you can also skip the proxy URL.
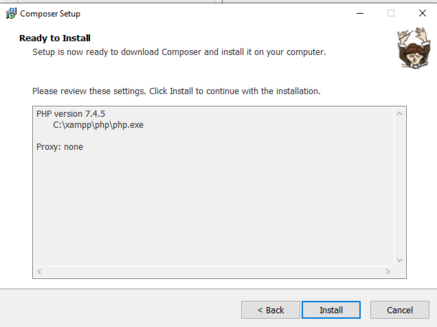
Your install should look similar to this:
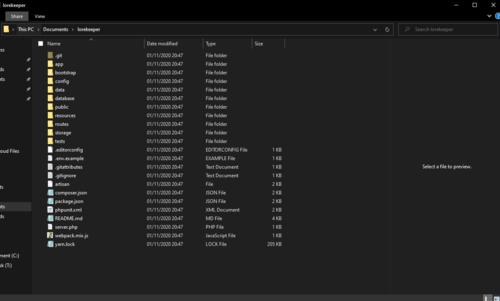
Once installed globally, open your local Lorekeeper folder.
Copy the file directory:
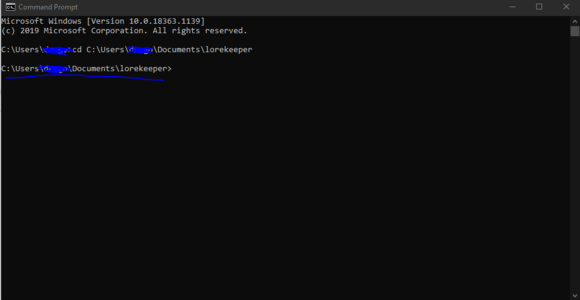
Open command prompt. You may need to run with administrator privileges.
Type the following:
cd <directory>
If typed correctly, the next line should read as your directory
Type the following:
composer install
It should start an install process, like so:
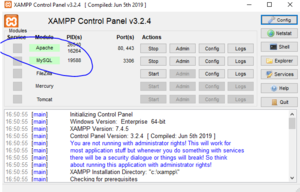
While composer installs, if you have not already, start Apache and MySQL via your XAMPP control panel:
Go to http://localhost/phpmyadmin in your browser.
(note the link may be http://localhost:8080 if you have set your port to 80. If you haven’t or don’t know what port you’re using, localhost will work fine.)
Create a new database:
Set the name aside to add to your .env file.
Create a file in your Lorekeeper directory with the name .env. An example .env is included at the bottom of this tutorial.
Once done and packages have been installed using Composer, run the following commands in command prompt, ensuring you are in your Lorekeeper directory:
Your .env file MUST be set up for these to work.
php artisan key:generate
php artisan migrate
php artisan add-site-settings
php artisan add-text-pages
php artisan copy-default-images
php artisan setup-admin-user
As of 2.0.0, when you run the setup-admin-user command in a local environment (see the example .env settings below), it will ask you if you wish to enter an alias (a deviantArt username by default, does not need to be a real account given that it is for testing, etc.) and verify your email address. However, subsequent users must still be manually verified in the database.
You now have two options for accessing your local Lorekeeper:
- Editing your Document Root
- This is recommended if you are only working on one project (in this case, Lorekeeper), as you can set it up initially and then have it just work.
- Using
php artisan serve- This is recommended if you work on multiple projects, as it makes it much easier to switch between them on the fly without having to make config edits...
- And/or if you have other things you host locally via XAMPP, as editing your document root will disrupt access to them.
- However, you must run the command each time you wish to access your local Lorekeeper.
Editing your Document Root
Once this process has completed, open XAMPP and STOP your Apache service.
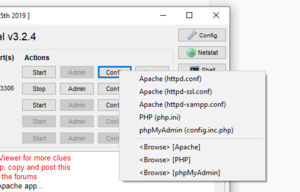
Next, click config on the apache line, and select Apache (httpd.conf). It will open a text document.
CTRL + F and search for “documentroot”
BY DEFAULT, YOUR DOCUMENT ROOT LINK WILL LEAD TO C:\Xampp OR SIMILAR
Change both links to be your Lorekeeper directory's public folder
E.g, the directory you used for command prompt, but with \public appended to the end.
Once done, save, and start apache again
Go to http://localhost
(note the link may be http://localhost:8080 if you have set your port to 80. If you haven’t or don’t know what port you’re using, localhost will work fine)
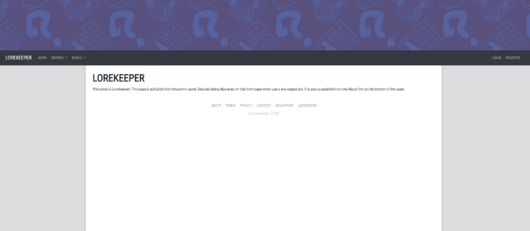
If done successfully, you should have a local server!
Using Serve
If you work on multiple projects or have difficulty with the above method, you can run a Laravel development server by using the php artisan serve command in your Lorekeeper directory like any other php artisan command. By default this command starts a development server on http://127.0.0.1:8000, but this can be configured using the following options:
--port=PORT HERE--host=IP HERE
Accessing your local Lorekeeper on other devices
If both devices (your host computer and any other device capable of browsing the internet) are on the same network (WiFi or otherwise), you can access a locally hosted site on another device! This can be useful for testing on mobile devices if you want to go beyond simulating them via dev tools in-browser, for instance.
You will need the IP address of the computer "hosting" your local site within your local network and/or its name, as well as another web-capable device.
Finding your computer's IP address and name
How to find your computer's IP:
- Press Win+R to bring up 'run'; type in cmd and press enter. This should bring up the command prompt.
- Type ipconfig. Look for IPv4 Address. This is your computer's IP address within the network, and can be used to access it from other devices within the network.
How to find your computer's name:
- Open File Explorer; on Win10, right click 'This PC' in the sidebar and select Properties in the dropdown menu.
- Find Device Name in the info displayed. This is the computer's name. You can use this to access the computer from [DEVICENAME].local on other devices within the network.
Accessing your site
If you're serving your local site via XAMPP(/edited your document root) already:
- Try accessing XAMPP on another device. If you have not changed the port XAMPP is listening on, you will be able to access it just via typing the host computer's local IP or
DEVICENAME.localinto the address bar of your browser on the other device. If you have changed it, add the port after either method, for example:8080if you have XAMPP listening on 8080. - If you have XAMPP configured to serve Lorekeeper, you should be set at this point, and should be able to interact with the site and test as needed.
If that doesn't work/you're using php artisan serve:
- On the host computer, serve your site using
php artisan serve --port=PORT --host=LOCAL IP.- The port can be any that aren't taken (8080 and higher are generally safe); telling it to listen specifically on your local IP is, at least in my experience, good for actually getting it to listen on it/to inbound requests from other devices on your local network.
- Windows may prompt you re firewall permissions for PHP; allow it at your discretion (it does need some kind of permissions for this to work, though. I just have it set up for private networks since my home network fits that description.)
You should now be able to access your site on other devices via LOCALIP:PORT or DEVICENAME.local:PORT!
Example .env File
Copy paste this if you are unsure what should be in your .env file.
The only variable you will need to change is your database name.
APP_NAME=Lorekeeper
APP_ENV=local
APP_KEY=
APP_DEBUG=true
APP_URL=http://localhost

CONTACT_ADDRESS=
DEVIANTART_ACCOUNT=

LOG_CHANNEL=stack
DB_CONNECTION=mysql
DB_HOST=127.0.0.1
DB_PORT=3306
DB_DATABASE=change to your database name! no spaces
DB_USERNAME=root
DB_PASSWORD=

BROADCAST_DRIVER=log
CACHE_DRIVER=file
QUEUE_CONNECTION=sync
SESSION_DRIVER=file
SESSION_LIFETIME=120

REDIS_HOST=127.0.0.1
REDIS_PASSWORD=null
REDIS_PORT=6379

MAIL_DRIVER=
MAIL_HOST=
MAIL_PORT=587
MAIL_USERNAME=
MAIL_PASSWORD=
MAIL_FROM_ADDRESS=
MAIL_FROM_NAME=

AWS_ACCESS_KEY_ID=
AWS_SECRET_ACCESS_KEY=
AWS_DEFAULT_REGION=
AWS_BUCKET=

PUSHER_APP_ID=
PUSHER_APP_KEY=
PUSHER_APP_SECRET=
PUSHER_APP_CLUSTER=
MIX_PUSHER_APP_KEY="${PUSHER_APP_KEY}"
MIX_PUSHER_APP_CLUSTER="${PUSHER_APP_CLUSTER}"
Common Errors
- Composer has ran out of memory
- Ensure that you have updated to the latest version of Composer, and to Composer v2 at minimum, as it is much less memory-intensive.
- You can do this by running
composer self-update.
- You can do this by running
- If updating Composer fails, you will need to find your php.ini file and set the memory limit to -1
- Ensure that you have updated to the latest version of Composer, and to Composer v2 at minimum, as it is much less memory-intensive.
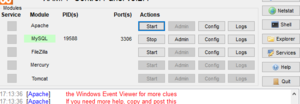
- Apache shutdown unexpectedly
- This error is usually caused by a mistyped / wrong document root.

